
Setting up a Data Lake involves multiple steps such as collecting, cleansing, moving, and cataloging data, and then securely making that data available for downstream analytics and Machine Learning. AWS LakeFormation simplifies these processes and also automates certain processes like data ingestion. In this post, we shall be learning how to build a very simple data lake using LakeFormation with hypothetical retail sales data.
AWS Lake Formation provides its own permissions model that augments the AWS IAM permissions model. This centrally defined permissions model enables fine-grained access to data stored in data lake through a simple grant/revoke mechanism. These permissions are enforced at the table and column level on the data catalogue and are mapped to the underlying objects in S3. LakeFormation permissions are applicable across the full portfolio of AWS analytics and Machine Learning services, including Amazon Athena and Amazon Redshift.
So, let’s get on with the setup.
Adding an administrator
First and foremost step in using LakeFormation is to create an administrator. An administrator has full access to LakeFormation system and initial access to data configuration and access permissions.


After adding an administrator, navigate to the Dashboard using the sidebar. This illustrates the typical process of Data lake setup.

Register location
From Register and Ingest sub menu in the sidebar, If you wish to setup data ingestion, that is, import unprocessed/landing data, AWS LakeFormation comes with in-house Blueprints that one could use to build Workflows. These workflows could be scheduled as per the needs of the end-user. Sources of data for these workflows can be a JDBC source, log files and many more. Learn more about importing data using workflows here.
If your ingestion process doesn’t involve any of the above mentioned ways and writes directly to S3, it’s alright. Either way we end up registering that S3 location as one of the Data Lake locations.

Once created you shall see its listing in the Data Lake locations.

You could not only access this location from here but also set permission to objects stored in that path. If preferred, one could register lake locations precisely for each processing zone and set permissions accordingly. I registered it to the whole bucket.
I created 2 retail datasets (.csv), one with 20 records and the other with 5 records. I have uploaded one of the datasets (20 records) to S3 with raw/retail_sales prefix.

Creating a Database
Lake Formation internally uses the Glue Data Catalog, so it shows all the databases available. From the Data Catalog sub menu in the sidebar, navigate to Databases to create and manage all the databases. I created a database called merchandise with default permissions.

Once created, you shall see its listing, and also manage, grant/revoke permissions and view tables in that DB.

Creating Crawlers and ETL jobs
From the Register and Ingest sub menu in the sidebar, navigate to Crawlers, Jobs to create and manage all Glue related services. Lake Formation redirects to AWS Glue and internally uses it. I created a crawler to get the metadata for objects residing in raw zone.

After running this crawler manually, now raw data can be queried from Athena.

I created an ETL job to run a transformation on this raw table data.

All it does is change the class type of purchase date, which is from string class to date class. Creates partitions while writing to refined zone in parquet format. These partitions are created from the processing date but not the purchase date.
retail-raw-refined ETL job python script:
import sys
from awsglue.transforms import *
from awsglue.utils import getResolvedOptions
from pyspark.context import SparkContext
from awsglue.context import GlueContext
from awsglue.job import Job
import datetime
from pyspark.sql.functions import *
from pyspark.sql.types import *
from awsglue.dynamicframe import DynamicFrame
from pyspark.sql import *

## @params: [JOB_NAME]
args = getResolvedOptions(sys.argv, ['JOB_NAME'])

sc = SparkContext()
glueContext = GlueContext(sc)
spark = glueContext.spark_session
job = Job(glueContext)
job.init(args['JOB_NAME'], args)
## @type: DataSource
## @args: [database = "merchandise", table_name = "raw_retail_sales", transformation_ctx = "datasource0"]
## @return: datasource0
## @inputs: []
datasource0 = glueContext.create_dynamic_frame.from_catalog(database = "merchandise", table_name = "raw_retail_sales", transformation_ctx = "datasource0")
## @type: ApplyMapping
## @args: [mapping = [("email_id", "string", "email_id", "string"), ("retailer_name", "string", "retailer_name", "string"), ("units_purchased", "long", "units_purchased", "long"), ("purchase_date", "string", "purchase_date", "date"), ("sale_id", "string", "sale_id", "string")], transformation_ctx = "applymapping1"]
## @return: applymapping1
## @inputs: [frame = datasource0]

#convert glue object to sparkDF
sparkDF = datasource0.toDF()
sparkDF = sparkDF.withColumn('purchase_date', unix_timestamp(sparkDF.purchase_date, 'dd/MM/yyyy').cast(TimestampType()))

applymapping1 = DynamicFrame.fromDF(sparkDF, glueContext,"datafields")
# applymapping1 = ApplyMapping.apply(frame = datasource0, mappings = [("email_id", "string", "email_id", "string"), ("retailer_name", "string", "retailer_name", "string"), ("units_purchased", "long", "units_purchased", "long"), ("purchase_date", "string", "purchase_date", "date"), ("sale_id", "string", "sale_id", "string")], transformation_ctx = "applymapping1")
## @type: ResolveChoice
## @args: [choice = "make_struct", transformation_ctx = "resolvechoice2"]
## @return: resolvechoice2
## @inputs: [frame = applymapping1]
resolvechoice2 = ResolveChoice.apply(frame = applymapping1, choice = "make_struct", transformation_ctx = "resolvechoice2")
## @type: DropNullFields
## @args: [transformation_ctx = "dropnullfields3"]
## @return: dropnullfields3
## @inputs: [frame = resolvechoice2]
dropnullfields3 = DropNullFields.apply(frame = resolvechoice2, transformation_ctx = "dropnullfields3")
## @type: DataSink
## @args: [connection_type = "s3", connection_options = {"path": "s3://test-787/refined/retail_sales"}, format = "parquet", transformation_ctx = "datasink4"]
## @return: datasink4
## @inputs: [frame = dropnullfields3]
now = datetime.datetime.now()
path = "s3://test-787/refined/retail_sales/"+'year='+str(now.year)+'/month='+str(now.month)+'/day='+str(now.day)+'/'
datasink4 = glueContext.write_dynamic_frame.from_options(frame = dropnullfields3, connection_type = "s3", connection_options = {"path": path}, format = "parquet", transformation_ctx = "datasink4")
job.commit()
The lakeformation:GetDataAccess permission is needed for this job to work. I created a new policy named LakeFormationGetDataAccess and attached it to AWSGlueServiceRoleDefault role.
{
    "Version": "2012-10-17",
    "Statement": [
        {
            "Sid": "VisualEditor0",
            "Effect": "Allow",
            "Action": "lakeformation:GetDataAccess",
            "Resource": "*"
        }
    ]
}
After running the job manually, it will load new transformed data with partitions in the refined zone as specified in the job.

I created another crawler to get the metadata for these objects residing in refined zone.

After running this crawler manually, now refined data can be queried from Athena.

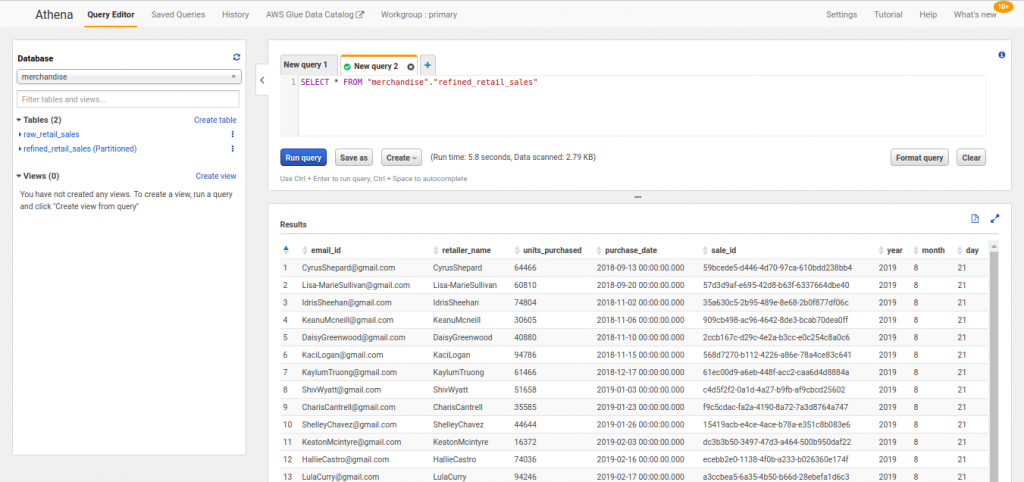
You could now see the newly added partition columns (year, month, day).
Let us add some new raw data and see how our ETL job process that delta difference.
We only want to process new data and old data is either moved to archive location or deleted from raw zone, whatever is preferred.

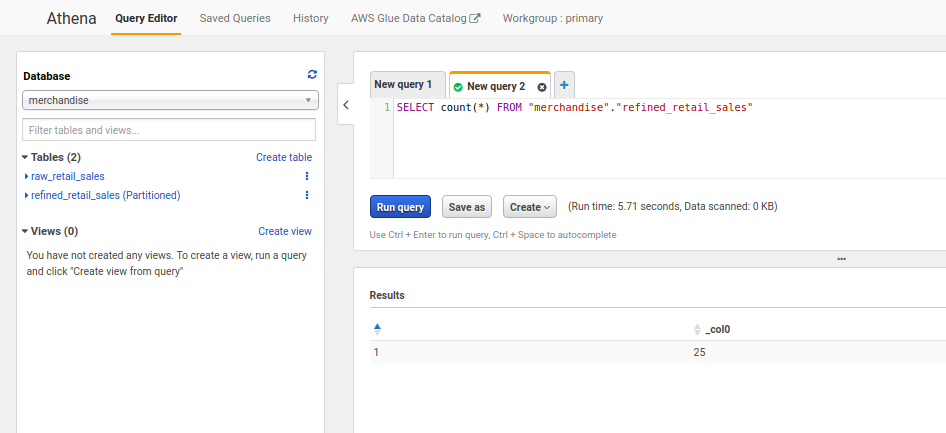
Run the ETL job again. See new files being added into refined zone.

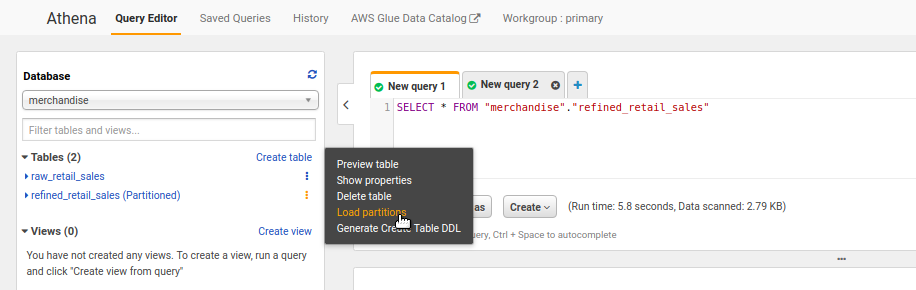
Load new partitions using msck repair table query.
Note: Try creating another IAM user and as an administrator in the LakeFormation, give this user limited access to the tables, try querying using Athena. See if the permissions are working.
Pros and cons of LakeFormation
The UI is made simple, all under one roof. Most of the times, one needs to keep multiple tabs open and opening S3 locations is troublesome. This is made easy by register data lake locations feature, one not only can access these locations directly but also revoke/grant permissions of the objects residing there.
Managing permissions on an Object level in S3 is a hectic process. But with LakeFormation permissions can be managed at the data catalog level. This enables one to grant/revoke permissions to users or roles on a table/column level. These permissions are internally mapped to underlying objects sitting in S3.
Though managing permissions, data ingestion workflow are made easy, but still most of the Glue processes like ETL, Crawler, ML specific transformations have to be setup manually.
This story is authored by Koushik. He is a software engineer and a keen data science and machine learning enthusiast.
Comments